
Session은 일정한 시간동안 저장되며 클라이언트와 서버 사이에서 소통할 때 사용된다. 오늘은 Next.js에 세션을 적용하는 법에 알아보고자 한다. 세션이 Next.js에서 어떻게 동작하는지 간단한 어플리케이션을 만들어 확인하려고 한다. 시작해보자.
필수
- Next.js와 typescript에 대한 기본 지식
설치
iron-session을 사용할 것이다. 이유는 Next.js 문서에 언급이 되었으며 적용하는데 어려움이 없는 라이브러리이기 때문이다. 다음과 같이 Next.js 어플리케이션에 iron-session을 설치한다:
npm install iron-session목표
두 개의 페이지를 만든다. 하나는 index 페이지이고 다른 하나는 login 페이지다. index 페이지에서 로그인한 사용자의 이름을 보여주고 아니면 기본값으로 I'm Guest User 를 보여준다. 로그인 페이지에서는 log-in 요청을 API에 보낸다. 요청이 성공적으로 완료되면 index 페이지로 이동시킨다. 마지막으로 log-in 요청을 처리하는 API가 필요한데 여기에서 세션을 저장하게 된다.
사용자가 로그인하면 해당 사용자의 이름이 출력이 되는지 확인하고 페이지를 새로고침하였을 때, 그 이름이 지정된 시간동안 그대로 남아 있는지 확인하는 것이 목표다.
App 구조
프로젝트 폴더 하위에 중요 부분의 구조만 나타내면 다음과 같다:
├── lib
│   ├── withSession.tsx
├── pages
│   ├── api
│   │   ├── login.tsx
│   ├── login
│   │   ├── index.tsx
│   ├── index.tsx
│   ├── _app.tsx
lib/withSession.tsx
세션을 처리하는 두 개의 wrapper 함수를 만든다. 이름에서 유추할 수 있듯이 하나는 API에 쓰이고 다른 하나는 getServersideProps 함수에 사용된다.
몇 가지 짚고 넘어갈 부분이 있다.
- typescript를 사용하기 때문에 세션에 무엇을 저장할 지 명시해야 한다 - username이 IronSessionData interface에 추가되었다
- 세션 옵션에 최소 32자의 문자를 지닌 비밀번호를 입력해야 한다
- 사용자의 필요에 맞게 cookieOptions를 설정한다
import { GetServerSidePropsContext, GetServerSidePropsResult, NextApiHandler } from "next";
import { withIronSessionApiRoute, withIronSessionSsr } from "iron-session/next";

declare module "iron-session" {
  interface IronSessionData {
    username?: string;
  }
}

const sessionOptions = {
  password: "cookie-password-must-be-at-least-32-character-long",
  cookieName: "my-cookie-name",
  // secure: true should be used in production (HTTPS) but can't be used in development (HTTP)
  cookieOptions: {
    secure: process.env.NODE_ENV === "production",
    maxAge: 100
  },
};

export function withSessionRoute(handler: NextApiHandler) {
  return withIronSessionApiRoute(handler, sessionOptions);
}

export function withSessionSsr<P extends { [key: string]: unknown } = { [key: string]: unknown } >(
  handler: ({req, res}: GetServerSidePropsContext) => GetServerSidePropsResult<P> | Promise<GetServerSidePropsResult<P>>,
) {
  return withIronSessionSsr(handler, sessionOptions);
}
pages/index.tsx
getServerSideProps이 세션 wrapper 함수에 인자 값으로 들어가는 것을 볼 수 있다. getServerSideProps에서 세션 정보에 접근이 가능하고 Home 컴포넌트에 prop으로 보낼 수 있게 된다. 사용자 이름이 세션에 저장이 되었다면 그 이름이 클라이언트에서 출력이 될 것이다.
import Link from "next/link";
import { withSessionSsr } from "../lib/withSession";
interface Props {
username: string;
}
export default function Home({ username }: Props) {
return (
<div>
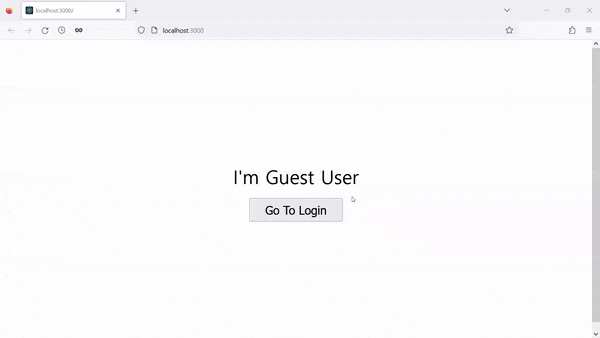
<div className="name">I'm {username || "Guest User"}</div>
<button><Link href={"/login"}>Go To Login</Link></button>
</div>
)
}
export const getServerSideProps = withSessionSsr(
async function getServersideProps({ req, res }) {
try {
const username = req.session.username || "";
return {
props: {
username: username
}
}
}
catch(err) {
console.log("page Home error", err);
return {
redirect: {
destination: '/login',
statusCode: 307
}
}
}
}
)pages/login/index.tsx
Login 컴포넌트는 사용자 정보를 다루고 api/login에 요청을 보낸다. 만약 사용자가 로그인이 되었다면 Home 라우트로 이동시킨다.
import { FormEvent, useRef, useEffect } from "react";
import { useRouter } from "next/router";
import { withSessionSsr } from "../../lib/withSession";

interface Props {
  username: string
}

export default function Login({ username }: Props) {
  const router = useRouter();
  const emailRef = useRef<HTMLInputElement>(null);

  useEffect(() => {
    if(username) {
      router.push({pathname: "/"});
    }
  }, [])

  async function login(event: FormEvent<HTMLFormElement>) {
    event.preventDefault();
    if(!emailRef.current) return;

    const email = emailRef.current.value;
    try {
      const options = {
        method: "POST",
        headers: {
          "Content-Type": "application/json"
        },
        body: JSON.stringify({ email: email })
      }
      const response = await fetch('/api/login', options);
      if(response.status !== 200) throw new Error("Can't login")
      router.push({ pathname: "/" });
    }
    catch(err) {
      console.log(err);
    }
  }
  return (
    <div>
      <form onSubmit={login}>
        <input type="text" ref={emailRef} />
        <button type="submit">Login</button>
      </form>
    </div>
  )
}

export const getServerSideProps = withSessionSsr(
  async function getServersideProps({ req, res }) {
    try {
      const username = req.session.username || "";

      return {
        props: {
          username: username
        }
      }
    }
    catch(err) {
      console.log(err);

      return {
        redirect: {
          destination: '/login',
          statusCode: 307
        }
      }
    }
  }
)
pages/api/login.tsx
이 endpoint는 클라이언트로부터 log-in 요청을 받고 데이터베이스에서 사용자를 찾는다. 그리고 조건에 맞는 사용자를 확인하면 그 정보를 세션에 저장한다 - 아시다시피 아래와 같이 mockUsers를 사용하는 대신 실제 개발에서는 데이터베이스를 적용해야 한다.
import { withSessionRoute } from "../../lib/withSession";

const mockUsers = [
  {
    username: "Admin User",
    email: "admin@gmail.com"
  },
  {
    username: "Just User",
    email: "justuser@gmail.com"
  }
];

export default withSessionRoute(
  async function handler(req, res) {
    switch (req.method) {
      case "POST":
        const { email } = req.body;
				const loggedInUsername = mockUsers.find(user => user.email === email);

        if(!loggedInUsername) {
          res.status(404).send("Can't find the user");
          break;
        }

        req.session.username = loggedInUsername.username;
        await req.session.save();

        res.status(200).send('Found the user');
        break;
      default:
        res.status(405).end(`${req.method} Not Allowed`);
        break;
    }
  }
);
실행
코드를 실행하여 다음과 같이 시도해본다:
Admin User라는 사용자가 로그인하고 페이지를 새로고침했을 때, 지정한 시간만큼 세션에 정보가 저장되어 있기 때문에 여전히 Admin User를 출력한다.
Next.js에서 세션이 어떻게 동작하는지에 중점을 두었기 때문에 아주 간단한 예를 들었지만 중요 개념을 이해하고 개인의 프로젝트에 맞게 응용/발전시켜 보기를 바란다.
읽어 주셔서 감사합니다. To be continued!